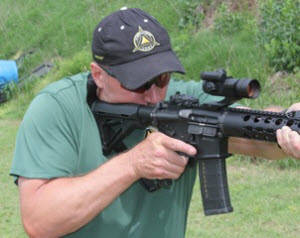
 Do you control your rifle? More specifically, can you shoot it accurately, yet very fast, at distances of 25 yards or more? This article focuses on a high-performance stance/mount system that will ensure you can not only shoot accurately with your rifle, but also get it on target quickly and shoot with superior speed. Once you have made the decision to use deadly force, the faster you can neutralize the threat, and the more you increase your chances of survival. This means that you will need to get the first hit as fast as possible, and follow-up hits even faster.
Use of a rifle for self-defense or as a superior weapon is more and more common these days, with the ease of getting a great M4 system and all the accessories one could possibly want. With these accessories comes the downside of relying on a gadget to improve performance, rather than spending time on training and money on ammunition.
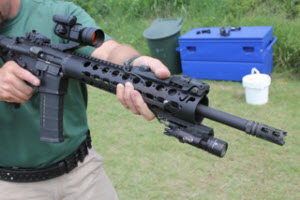
I like light, functional rifles, and each of my JP tactical rifles has at least the following on it:
- Optic
- Sling system
- Mounted light (probably with pressure activation)
- Back-up sights
- Good muzzle brake (no competition compensators on the tactical guns)
- BAD lever (a device made by Magpul that allows me to lock the bolt to the rear without switching hands, as well as release the bolt with my trigger finger)
Other than that, you will not find anything on my guns that will make them heavier, bulkier or difficult to manipulate.
How do we control recoil? First, let’s look at how a rifle recoils in comparison to a handgun. Handguns have a higher access-to-bore ratio, which means that the recoil will travel in an upward manner. A rifle’s recoil will travel in a more linear path straight back because the bore (on an M16/4 system) is actually in line with the stock, which we have mounted on the shoulder. This is one of the reasons that a rifle can be shot so much faster than a handgun in some cases (e.g., at distance).
Assuming we are in a situation where we need to fire to protect life and limb, it can almost always be assumed that speed and accuracy must be balanced. This means that hitting is the first priority, and it is directly balanced with the ability to hit the first shot as well as follow-up shots faster. Here are the keys to mounting and controlling a rifle for fast follow-up shots.
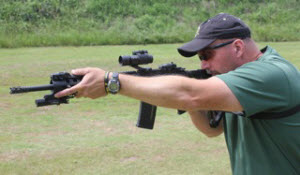
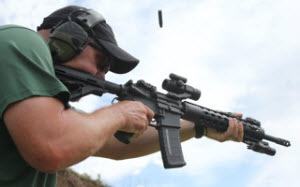
Square the hips to the target and get your body weight forward. To facilitate this, the strong-side foot can be slightly back rather than square.
1. Square the body and weight forward.
Most shooters will want to blade the body off more than necessary. Squaring up with the strong-side foot only slightly back will allow one to mount the rifle in a more centered position on the chest (see Step 4). Staying centered offers the benefit of allowing the pelvic girdle to stay as square as possible to the target, improving the stability and mobility of the shooter. Weight forward simply means that the nose should be over the toes.
To test this, stand square to a friend, drop your strong-side foot back slightly, unlock your knees and stand upright. Have your friend push back on the center of your chest. Then bend forward (without bending your knees much more) and simply place your nose just barely in front of your toes. Have your buddy push on you again. You (and he) will find that simply shifting your upper body weight forward of your center of balance offers substantial recoil potential due to the weight shift.
2. Grip the gun high with the strong hand.
This is the term we often use with a handgun, but it applies to a rifle too. Your grip with the shooting hand (the one on the pistol grip that controls the fire systems) should be as high on the pistol grip (or forward if using a standard stock) as possible. Once you find this position, ensure you apply grip pressure and pull the rifle straight to the rear into the chest (where the stock is mounted) when shooting. Simply resting the hand there will not do the trick.
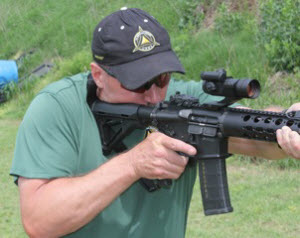
3. With the support hand, grip as far forward on the handguard as possible.
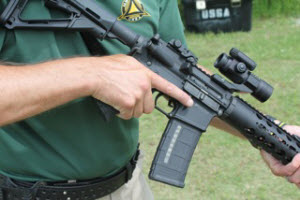
This is an area that I often see taught and done wrong. The biggest mistake I have seen here is actually moving the support hand back and grasping the magazine well. Gripping forward on the handguard offers a few advantages. First, it increases the recoil control of that hand, due to an increase in leverage on the front of the gun. Second, it offers a better mechanical advantage if one has to snap the gun to a new target, once again due to leverage.
Last, when gripping the gun forward with the support hand, the shooter has much more leverage if he is forced to try to retain his gun from a surprise close-range attack. Now, when gripping the gun with the support hand, ensure that you are gripping the handguard and pulling the rifle straight to the rear.
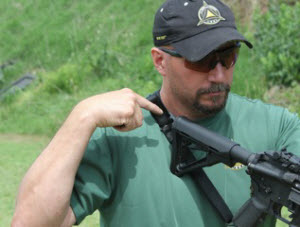
4. Mount the gun as centered as possible.
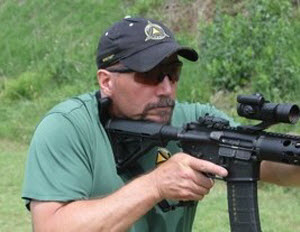
This is a big key to controlling recoil, and one that almost everyone I have worked with misses to some extent. Like many of you, I was taught a standard bladed stance (by both my father and the U.S. Marine Corps) that is more traditional and places the stock on the outer portion of the shoulder. The problem is that this placement of the stock allows the gun to turn the body as the rifle pushes backward. This causes the sights or dot to cycle high right or, for a left-handed shooter, left.
To find this centered spot on your chest area, stand relatively square to the target with the head erect and looking forward. Now grab the stock of the rifle and place it on the center of your chest.
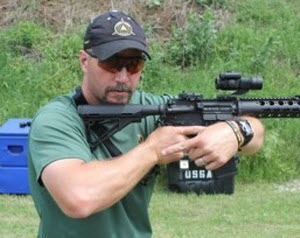
Dropping the strong-side elbow will increase the stability of the rifle and keep the elbow from banging against obstacles.
5. Drop the strong-side elbow.
Once you have mounted the rifle in the manner described above, your next area of focus will be to drop your strong-side elbow. This will do a couple things for you. First, it will flex the front deltoid and pectoral muscle on that side of the chest. Go ahead and test that: place your hand on your deltoid/pectoral area with the elbow out to the side and then drop it straight down. Second, it will keep the elbow low and out of the way so that it is less likely to get hit by bullets when shooting around cover, or bump into obstacles or people when you are moving.
6. Minimize and press.
Now that you have mounted the rifle into a secure “platform,” all you have to do is minimize the movement and press. The pressure on the gun should be substantial, but also neutral in a sense — straight to the rear except for the pressure required to hold the rifle upright. Therefore be careful to ensure that you don’t pull the rifle off to one side or the other.
Once you have established this mount/stance, it is imperative that you work on manipulating the trigger while moving nothing else. If the stance and mount are correct, you will have very little work to do to control the rifle and will have to learn to not “overwork” the recoil. Let your body weight and leverage control the recoil and focus your attention on the sights and trigger.
In closing, focus on the above tips to greatly increase your ability to fire faster while maintaining your acceptable level of accuracy with your rifle. Modify the techniques slightly if needed to work around body armor or gear. Strive to improve your ability to shoot with each practice session!
What type of sling is best?
Weak hand forward works great... for about 2 or 3 minutes. Try that while clearing a building that takes a couple of hours. That said, you can move your grip forward when you need to. Practice both ways. I agree that the mag well grip is less than optimal for clearing, but halfway sure puts a lot less strain on your shoulder, particularly if you drop that elbow and let it rest on your plate carrier. BTDT.
Good info
Great article. I was thought to roll my strong side shoulder forward and now I see that placing the stock towards the center of the chest does the same thing. Body armor makes it a bit more difficult and if you are not somewhat squared with the TGT the stock will tent to slide off. Regarding some grips and accessories that shooters add to the rifle, I also found that they are a one-trick-pony and do not work under different situations. I've tried the handle/bipod combo, the mag holder and grip, as well as the angled fore-grip. Most of them made it difficult to shoot thru barriers and openings in walls/fences, over vehicles, etc. Thank you for sharing TTPs. BB (Army SOF, retiring)
Glad to see someone suggest holding but toward center of chest. I’ve only seen one or two other instructors say this. I’ve been shooting this way my whole life. All these guys at the range put it on their deltoid rather than pectoral muscle.Then they are tilting their head over to the side. The closer to centerline the better. Support arm extended works great for recoil. Many say to keep trigger arm parallel to ground. It took me a 1000 rounds to figure out I shoot much more precisely with trigger arm tilted down. My cheek weld,and two arms form kind of a tripod of support. Follow through, firm grips, and eye on Point of aim make it all work. And keep pectoral muscle flexed to absorb recoil for long term shooting z it’s the only way I get through 60 to 100 rounds of 30-06 or 325wsm in A day. This is all off hand at 100 and 200 yards. Eventually I get some 3-4 inch groups at 200(not all). With my 223 I’ll get some 1-2 groups . The centerline, extended support arm work. This article was good advice.
Does this method apply to a Tavor rifle as well?
Mike, GREAT ARTICLE! Since rebuilding (years ago) my m4 stance/platform to the style you described very well, I've noticed greater controllability, accuracy, efficiency & effectiveness. I do use a short (stub) vertical grip placed about two inches from the end of the forearm. My weak hand grip is extended, thumb forward & resting at approx. 10 or 11 o'clock...creating a very similar (and familiar) weak hand support pistol grip type grip. Rob, are you "not a fan" of a vertical grip OR "not a fan" of the rifle shooting platform Mike explained? Thanks Guys!
What is your opinion on adding a vertical grip to the front of an AR?
Hello Jay- Thanks for reading the article, and your comments! The AK weak hand grip will have to be slightly modified unless you have a high rise optic mount and optic on the gun. Instead of laying the thumb over the top of the handguard, rather I point it more forward along the left side of the handguard, and attempt to keep that arm as far out on the gun as possible. This keeps the thumb out of the way and still allows me to control the front of the rifle.
Thanks for these awesome tips. These and your pistol articles are great. Would you mind talking about the weak hand grip, especially for an AK? It's clear from the picture above that you hold with the weak hand thumb over the handguard, but how would that work with an AK when the thumb would block the sights?