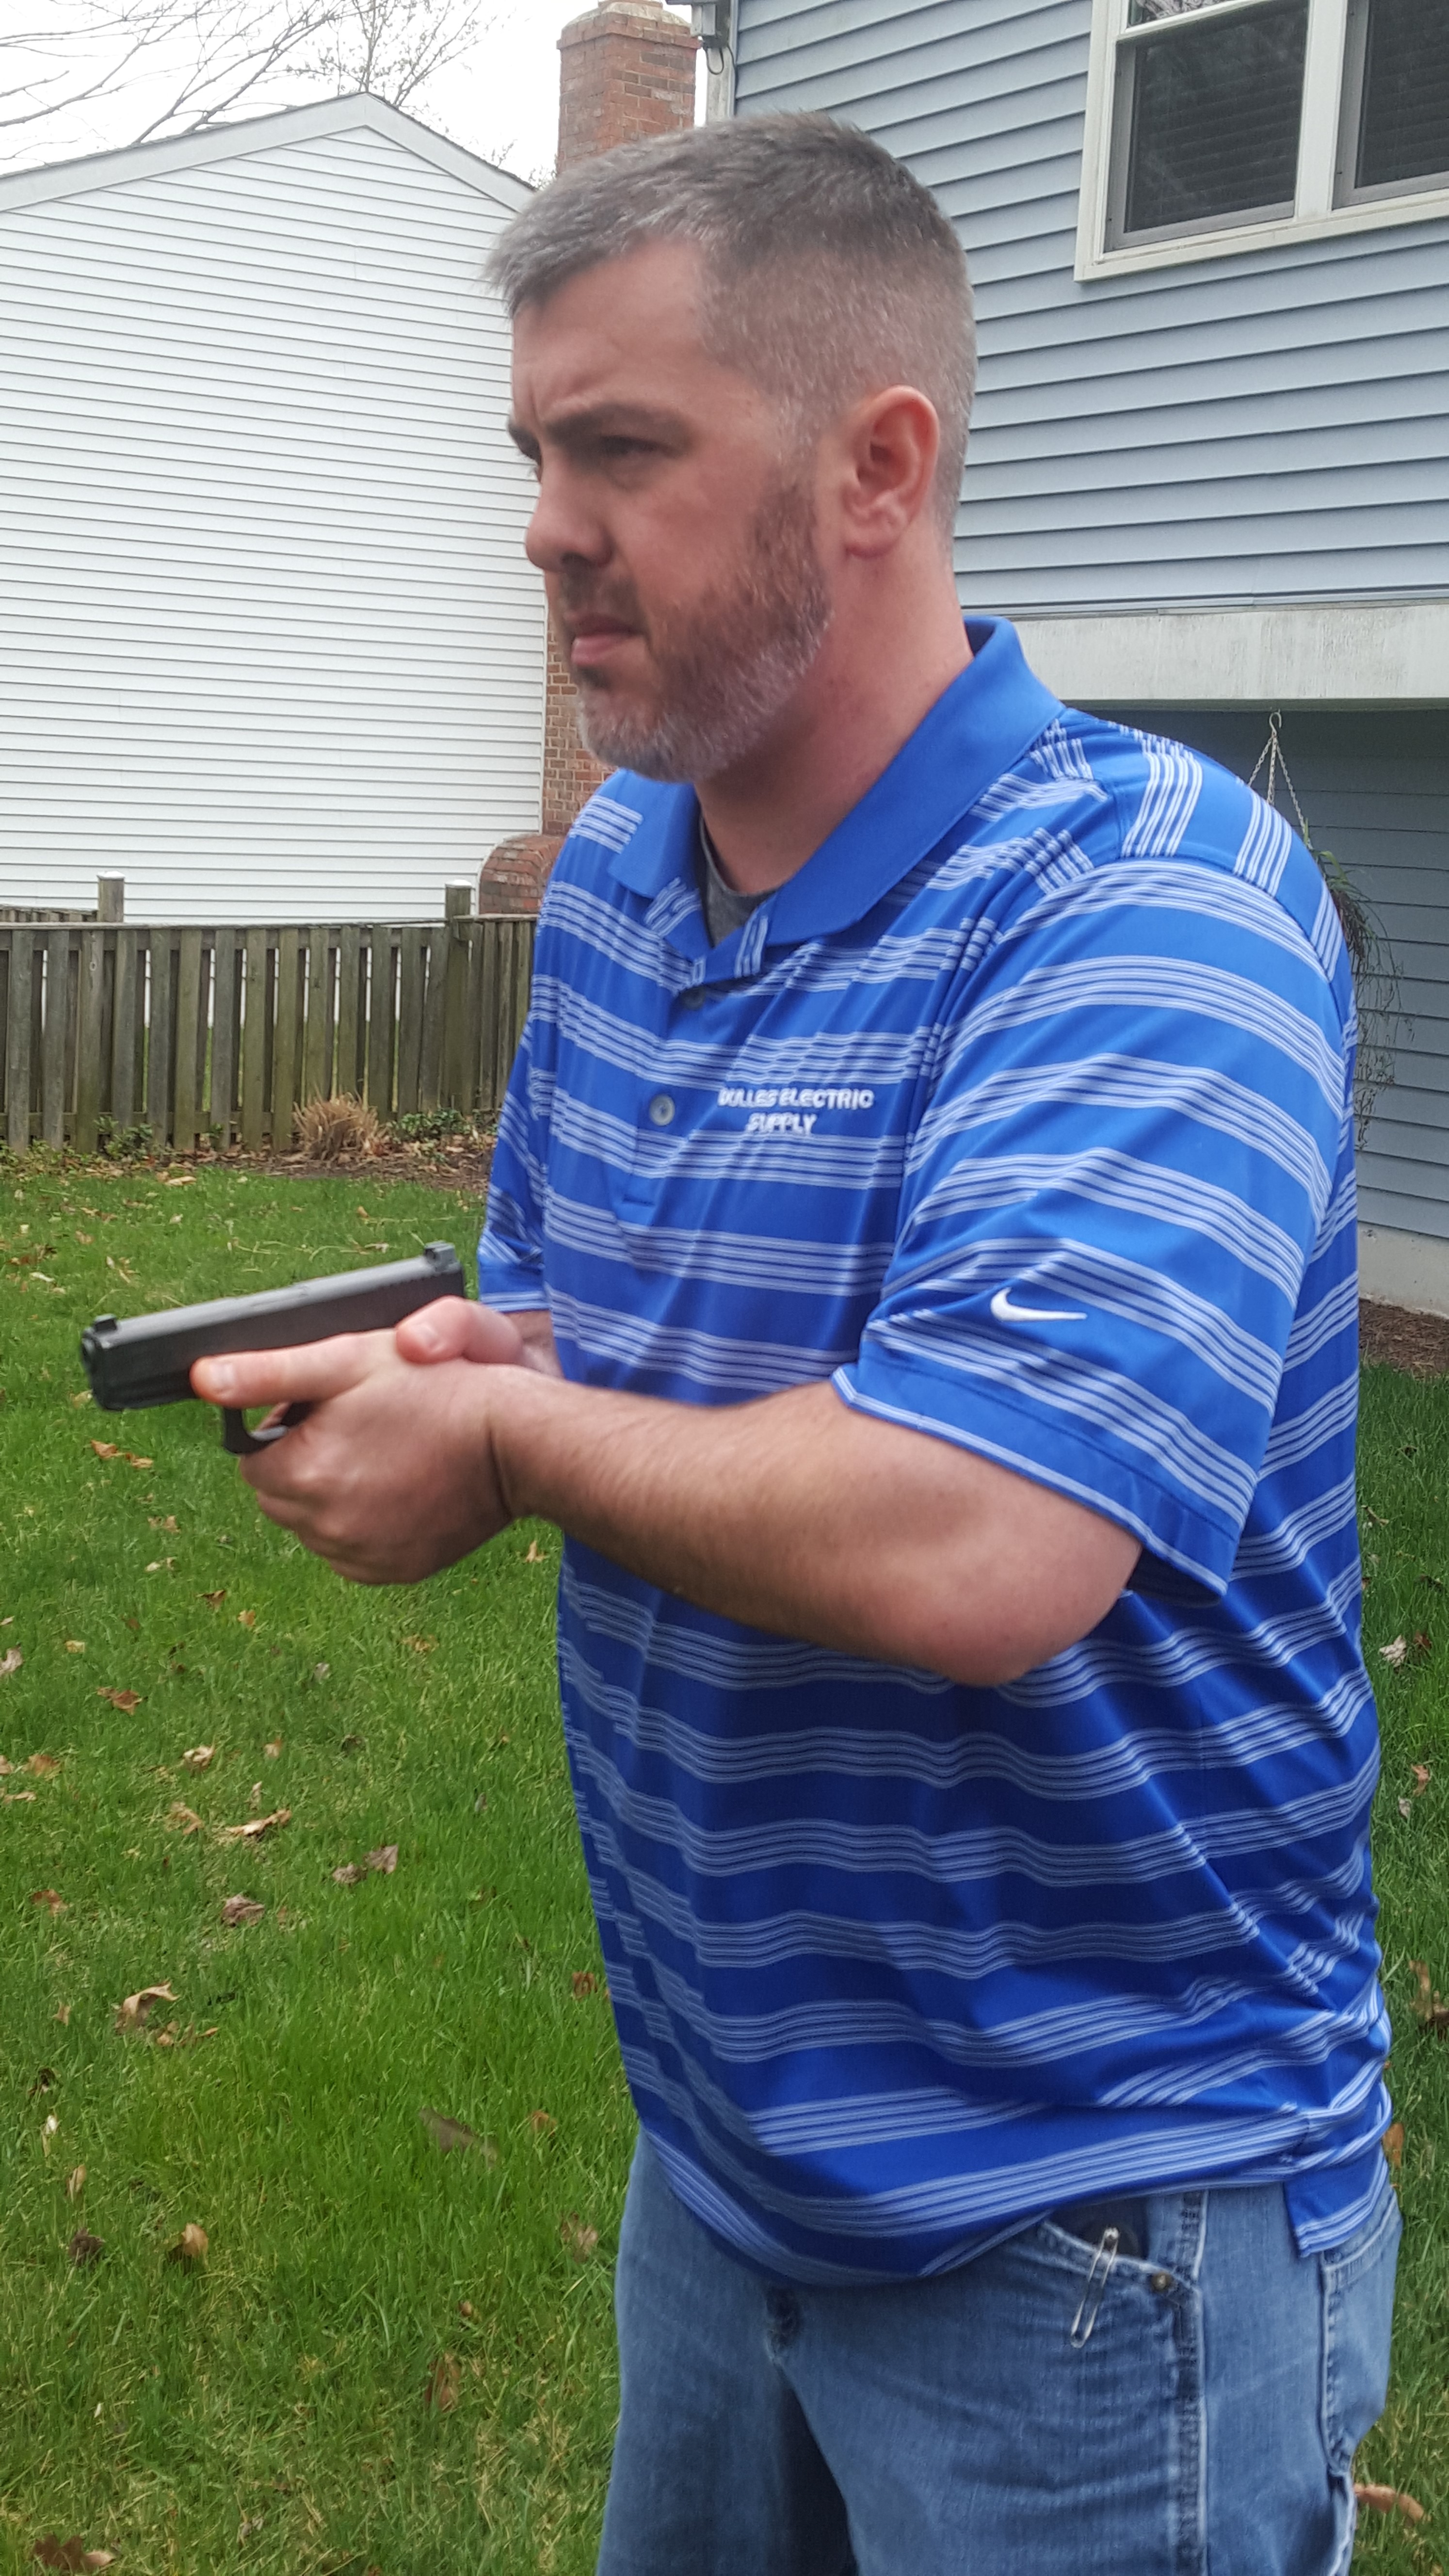
In this series of photos, the author demonstrates the technique he uses and teaches for locking the slide back. First he brings gun into his high compressed ready position, which is the most efficient place to work on the gun.
Photo: Laura Carson
Many people think they are not strong enough to lock the slide back. Many others tell people who struggle with locking the slide back that it is a strength issue. While strength can help you lock the slide back, it is not the base component; the proper technique is. It also helps to hold the gun in the proper location and position in relation to your body.
In this article, we will discuss the most efficient way to lock the slide back in a personal defense context. But keep in mind that it works just as well for those who are sport shooters (IDPA, USPSA, IPSC, GSSF) or target shooters.
REASONS FOR LOCKING THE SLIDE BACK
First let’s cover the traditional method that is taught for locking the slide to the rear on the pistol. For the purposes of this article, we are not going to cover why you are locking the slide back, but we will concede it is for one of the following reasons:
- During a malfunction clearance and you are at the point where a tap rack has not worked, a reload has not worked, and you need to rip/lock or remove the magazine.
- You are clearing the gun at the end of a training session or for other administrative reasons and need to lock it open to inspect the chamber to make sure it is empty. This can include:
- You are going to dry fire and once you have defined an area where it is safe to do so, you want to make sure the handgun is clear before starting your dry-fire session.
o Before storing the gun and/or making it inaccessible to unauthorized persons.
o Casing the gun for transportation reasons, e.g., leaving the range and heading home.
o You have a gun whose trigger needs to be pulled to do a basic field strip to clean it. Before you pull the trigger, check and make sure it is empty and clear of objects or ammunition. Also make sure it is pointed in a safe direction.
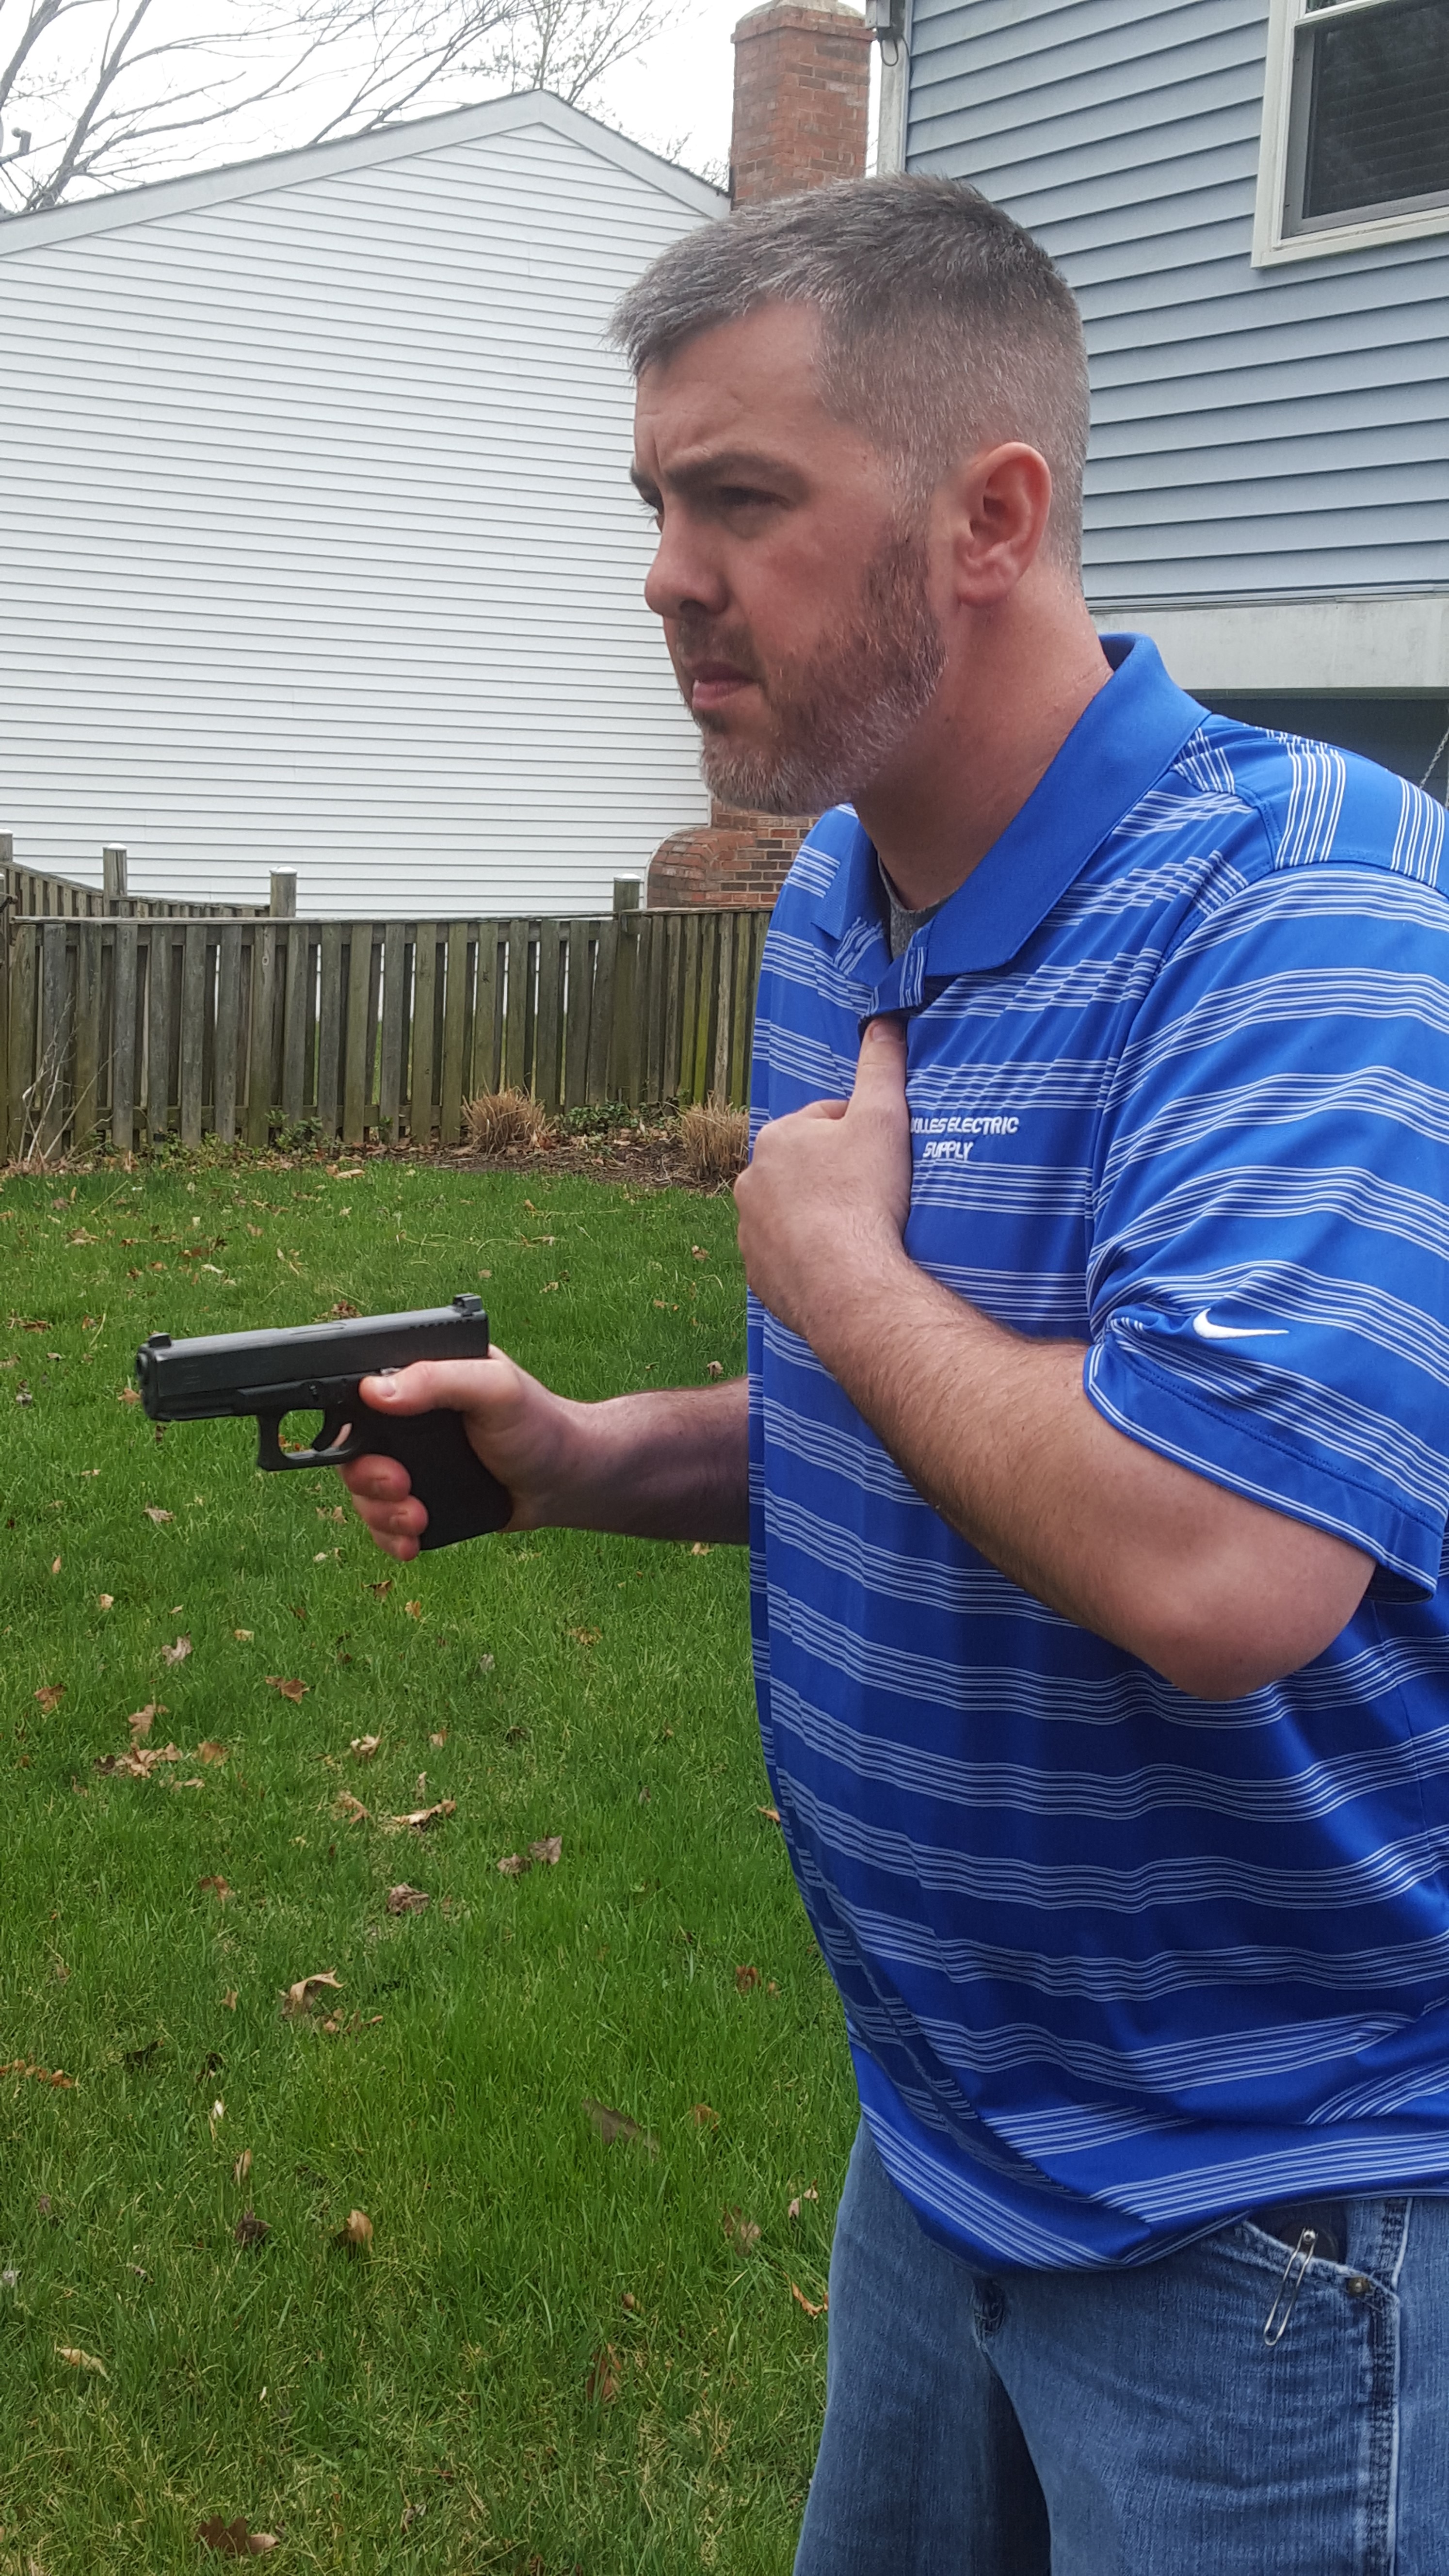
Author uses his strong-side thumb to push on and activate the slide stop before he places his support hand on the gun. Photo: Laura Carson
TRADITIONAL METHOD
The traditional method of locking the slide back or at least the way it is often taught is where the issues begin. Most of the time the instructor has you bring the gun back close to your body, if it isn’t already, then instructs you to grip the top of the slide with your support hand and pull the slide all the way to the rear and then push up with your strong-hand thumb on the slide-stop button. After that, they tell you to release or ride the slide forward with the support hand until the slide locks to the rear.
There are numerous issues with this approach. Those 200 students who have come to our courses with this method in mind have submitted that they will not, or cannot, lock the slide back. Unfortunately many instructors, or significant others, after seeing a student struggle, take the handgun and lock it to the rear for them. This does not help because now the student does not have the opportunity to build or develop the required skill. Let’s quickly cover the issues with this approach:
- It is not consistent with how we should be teaching, or as practitioners, interacting with the gun when we think about consistency, i.e., loading, unloading, and clearing malfunctions.
- This method does require more strength and muscle endurance because we have to hold the slide to the rear or at least back far enough that we can find and then activate the slide stop so it locks the slide to the rear.
- When loading, unloading, and clearing malfunctions, we should not be racking the slide to the rear and maintaining the grip on the slide once it stops (riding the slide). We should be pulling/racking the slide to the rear and, once the slide stops moving to the rear, we should let go and let the recoil spring do its job.
What is the correct way to lock the slide to the rear? Let’s briefly recap the grip and the location in which we should be working on the gun, and then we will give a step-by-step approach to locking the slide to the rear.
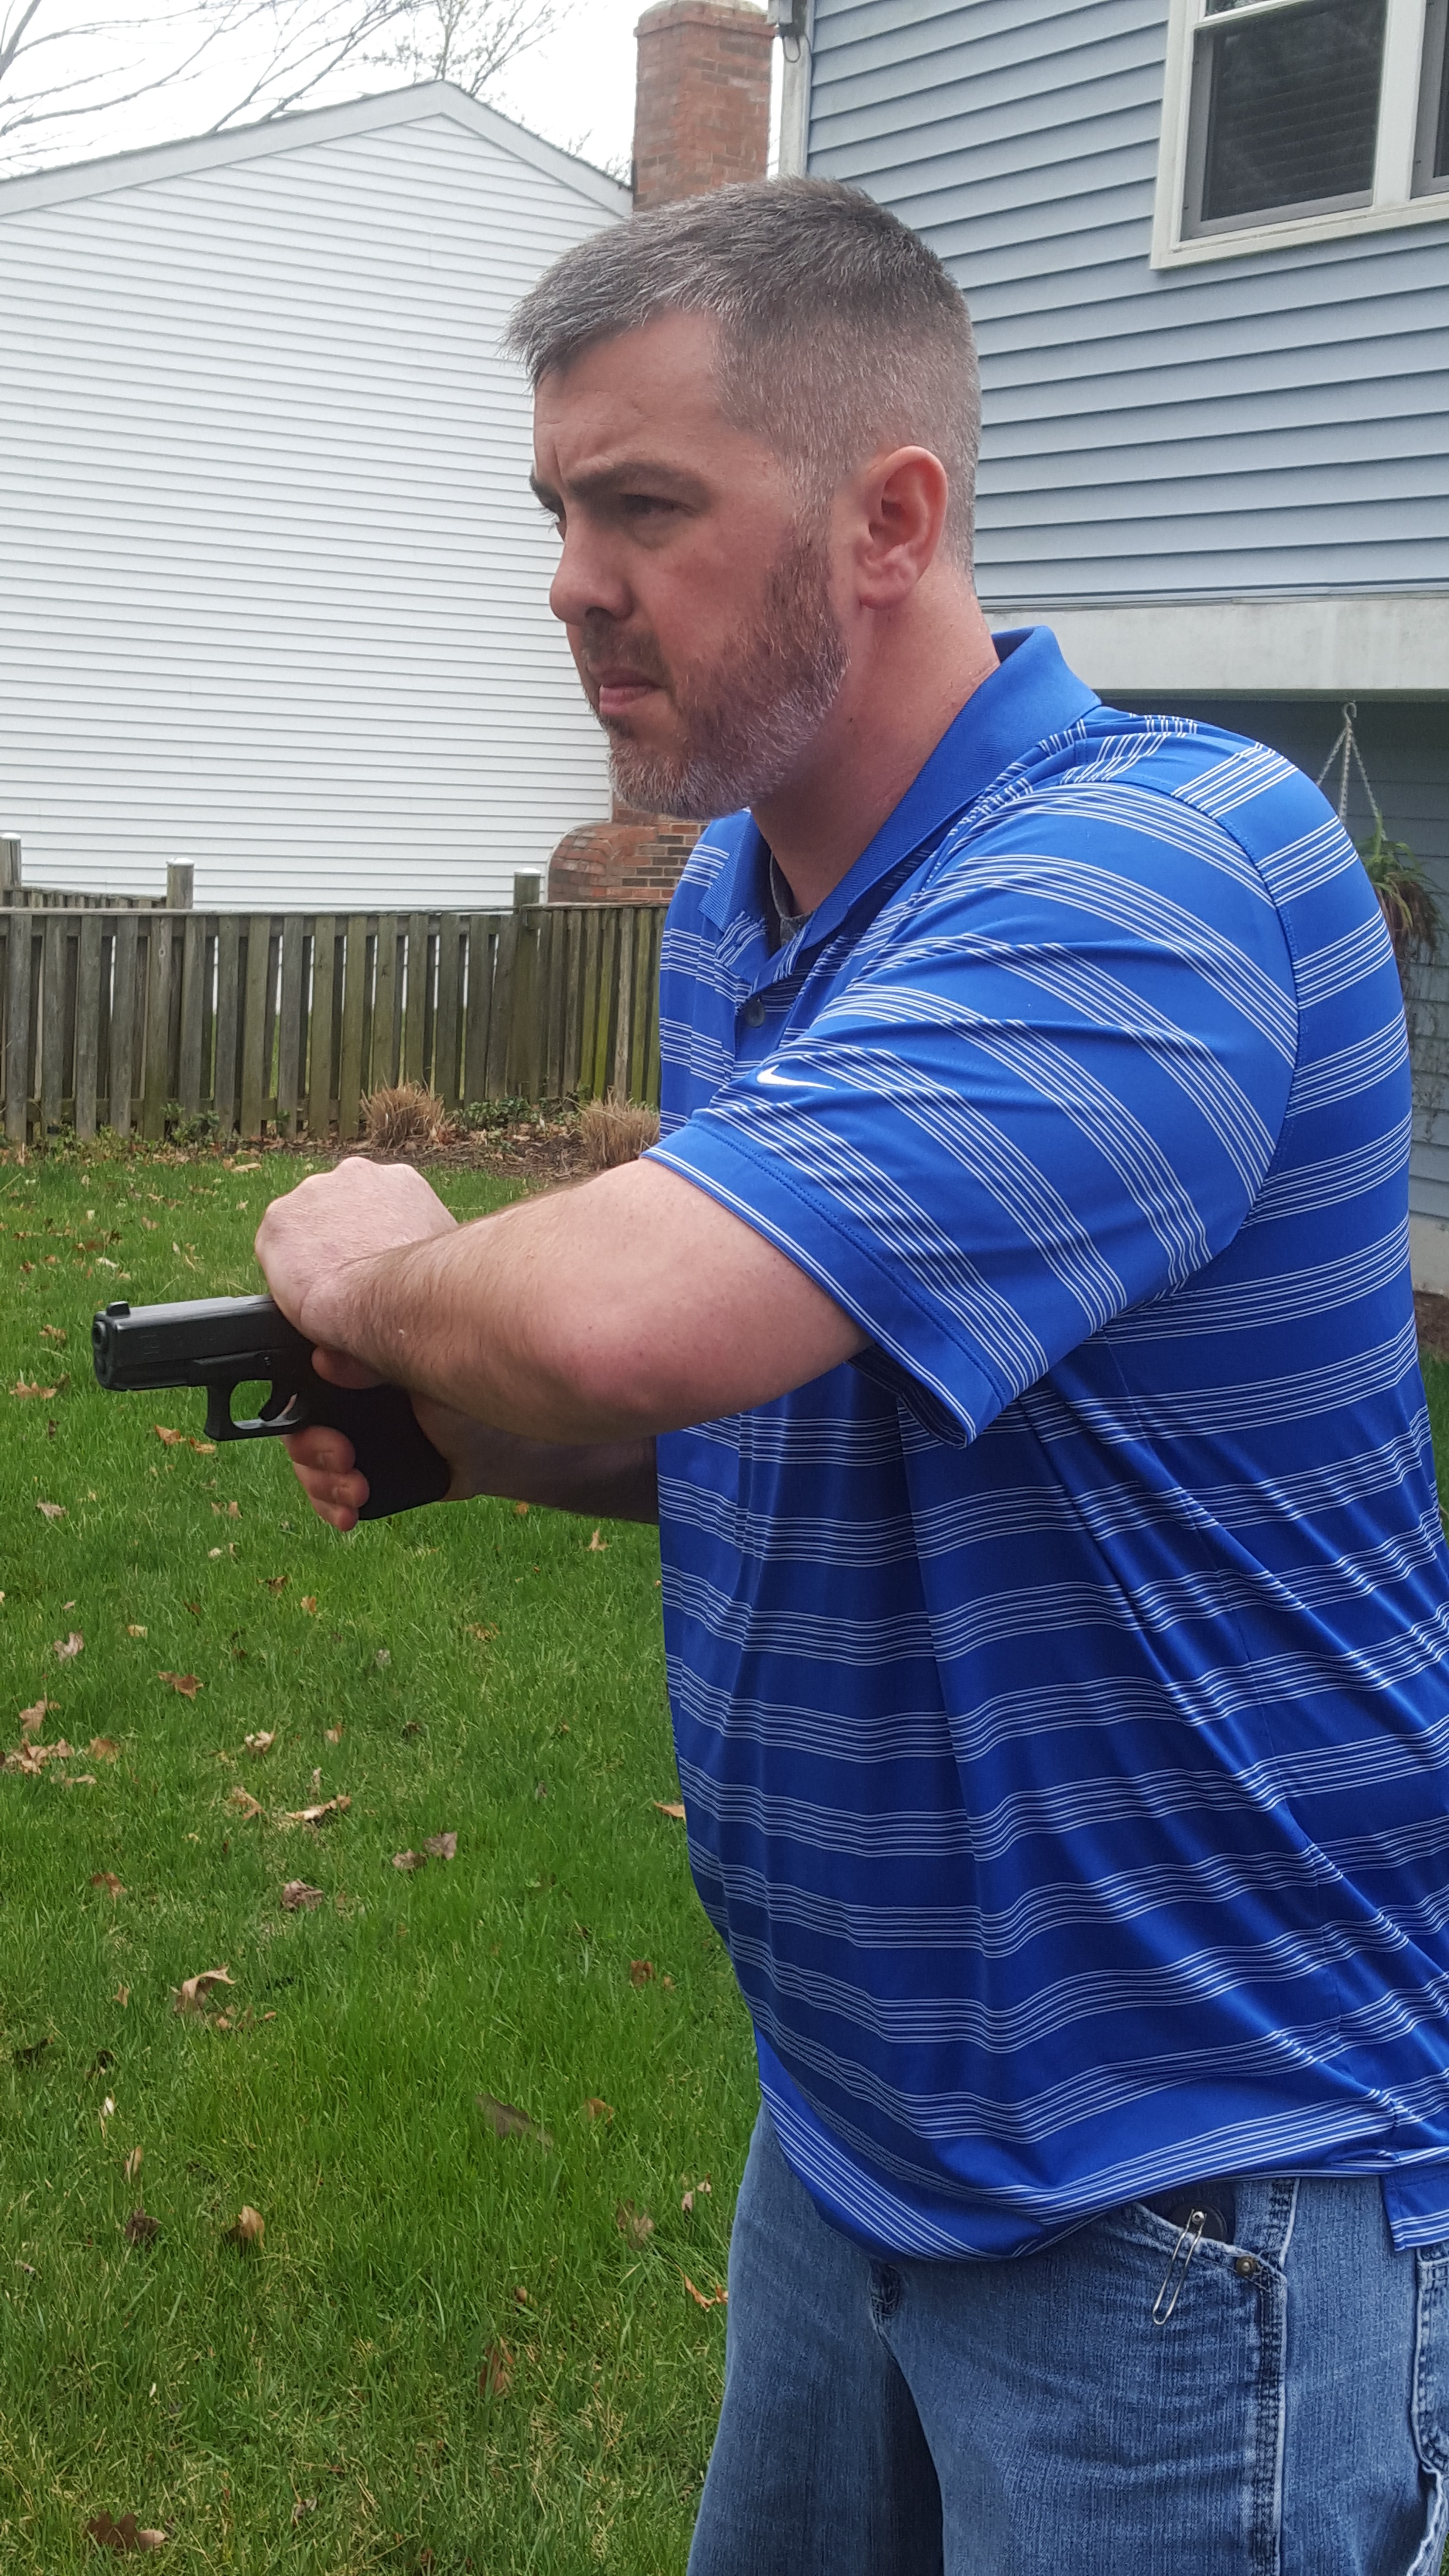
Author brings his support hand up and over the slide and grips it behind the ejection port with a strong and secure grip. Photo: Laura Carson
GRIP
- The web of the shooting hand should be as high as it can be on the back strap of the gun without interfering with the operation of the handgun (i.e., slide reciprocating to the rear).
- The trigger finger should be straight and along the frame of the handgun, not on or in the trigger guard and not on the slide.
- The middle-finger knuckle should have contact with the bottom of the trigger guard and all other strong-hand fingers should be wrapped around the grip with no space between the fingers. (In other words, you shouldn’t have your fingers splayed.)
- The bore line/slide line should be in line with the forearm.
- The strong-side thumb should be straight and tight along the frame of the gun, again as high as it can be without putting pressure on the slide. It should be high on the frame and on the opposite side of the gun as the trigger finger.
**Since this article is focusing on locking the slide, we are only covering the strong-hand grip, since the support hand will not be on the gun. (For a full two-handed grip, you can read other articles or watch videos here on Personal Defense Network to learn or acquire those techniques and skills.)
HIGH COMPRESSED READY POSITION
In my opinion, this is where you should be working on the gun. What does working on the gun mean? It means loading, unloading, and/or clearing malfunctions. It is also a default position you should be in when out of the holster but not shooting, and while scanning or processing information in your environment.
- In front of the chest
- Above the area that the gun would come up and out of the holster during a presentation
- Close to the chest
- Elbows in close to the body for strength and retention reasons
- Gun is parallel to the line of sight
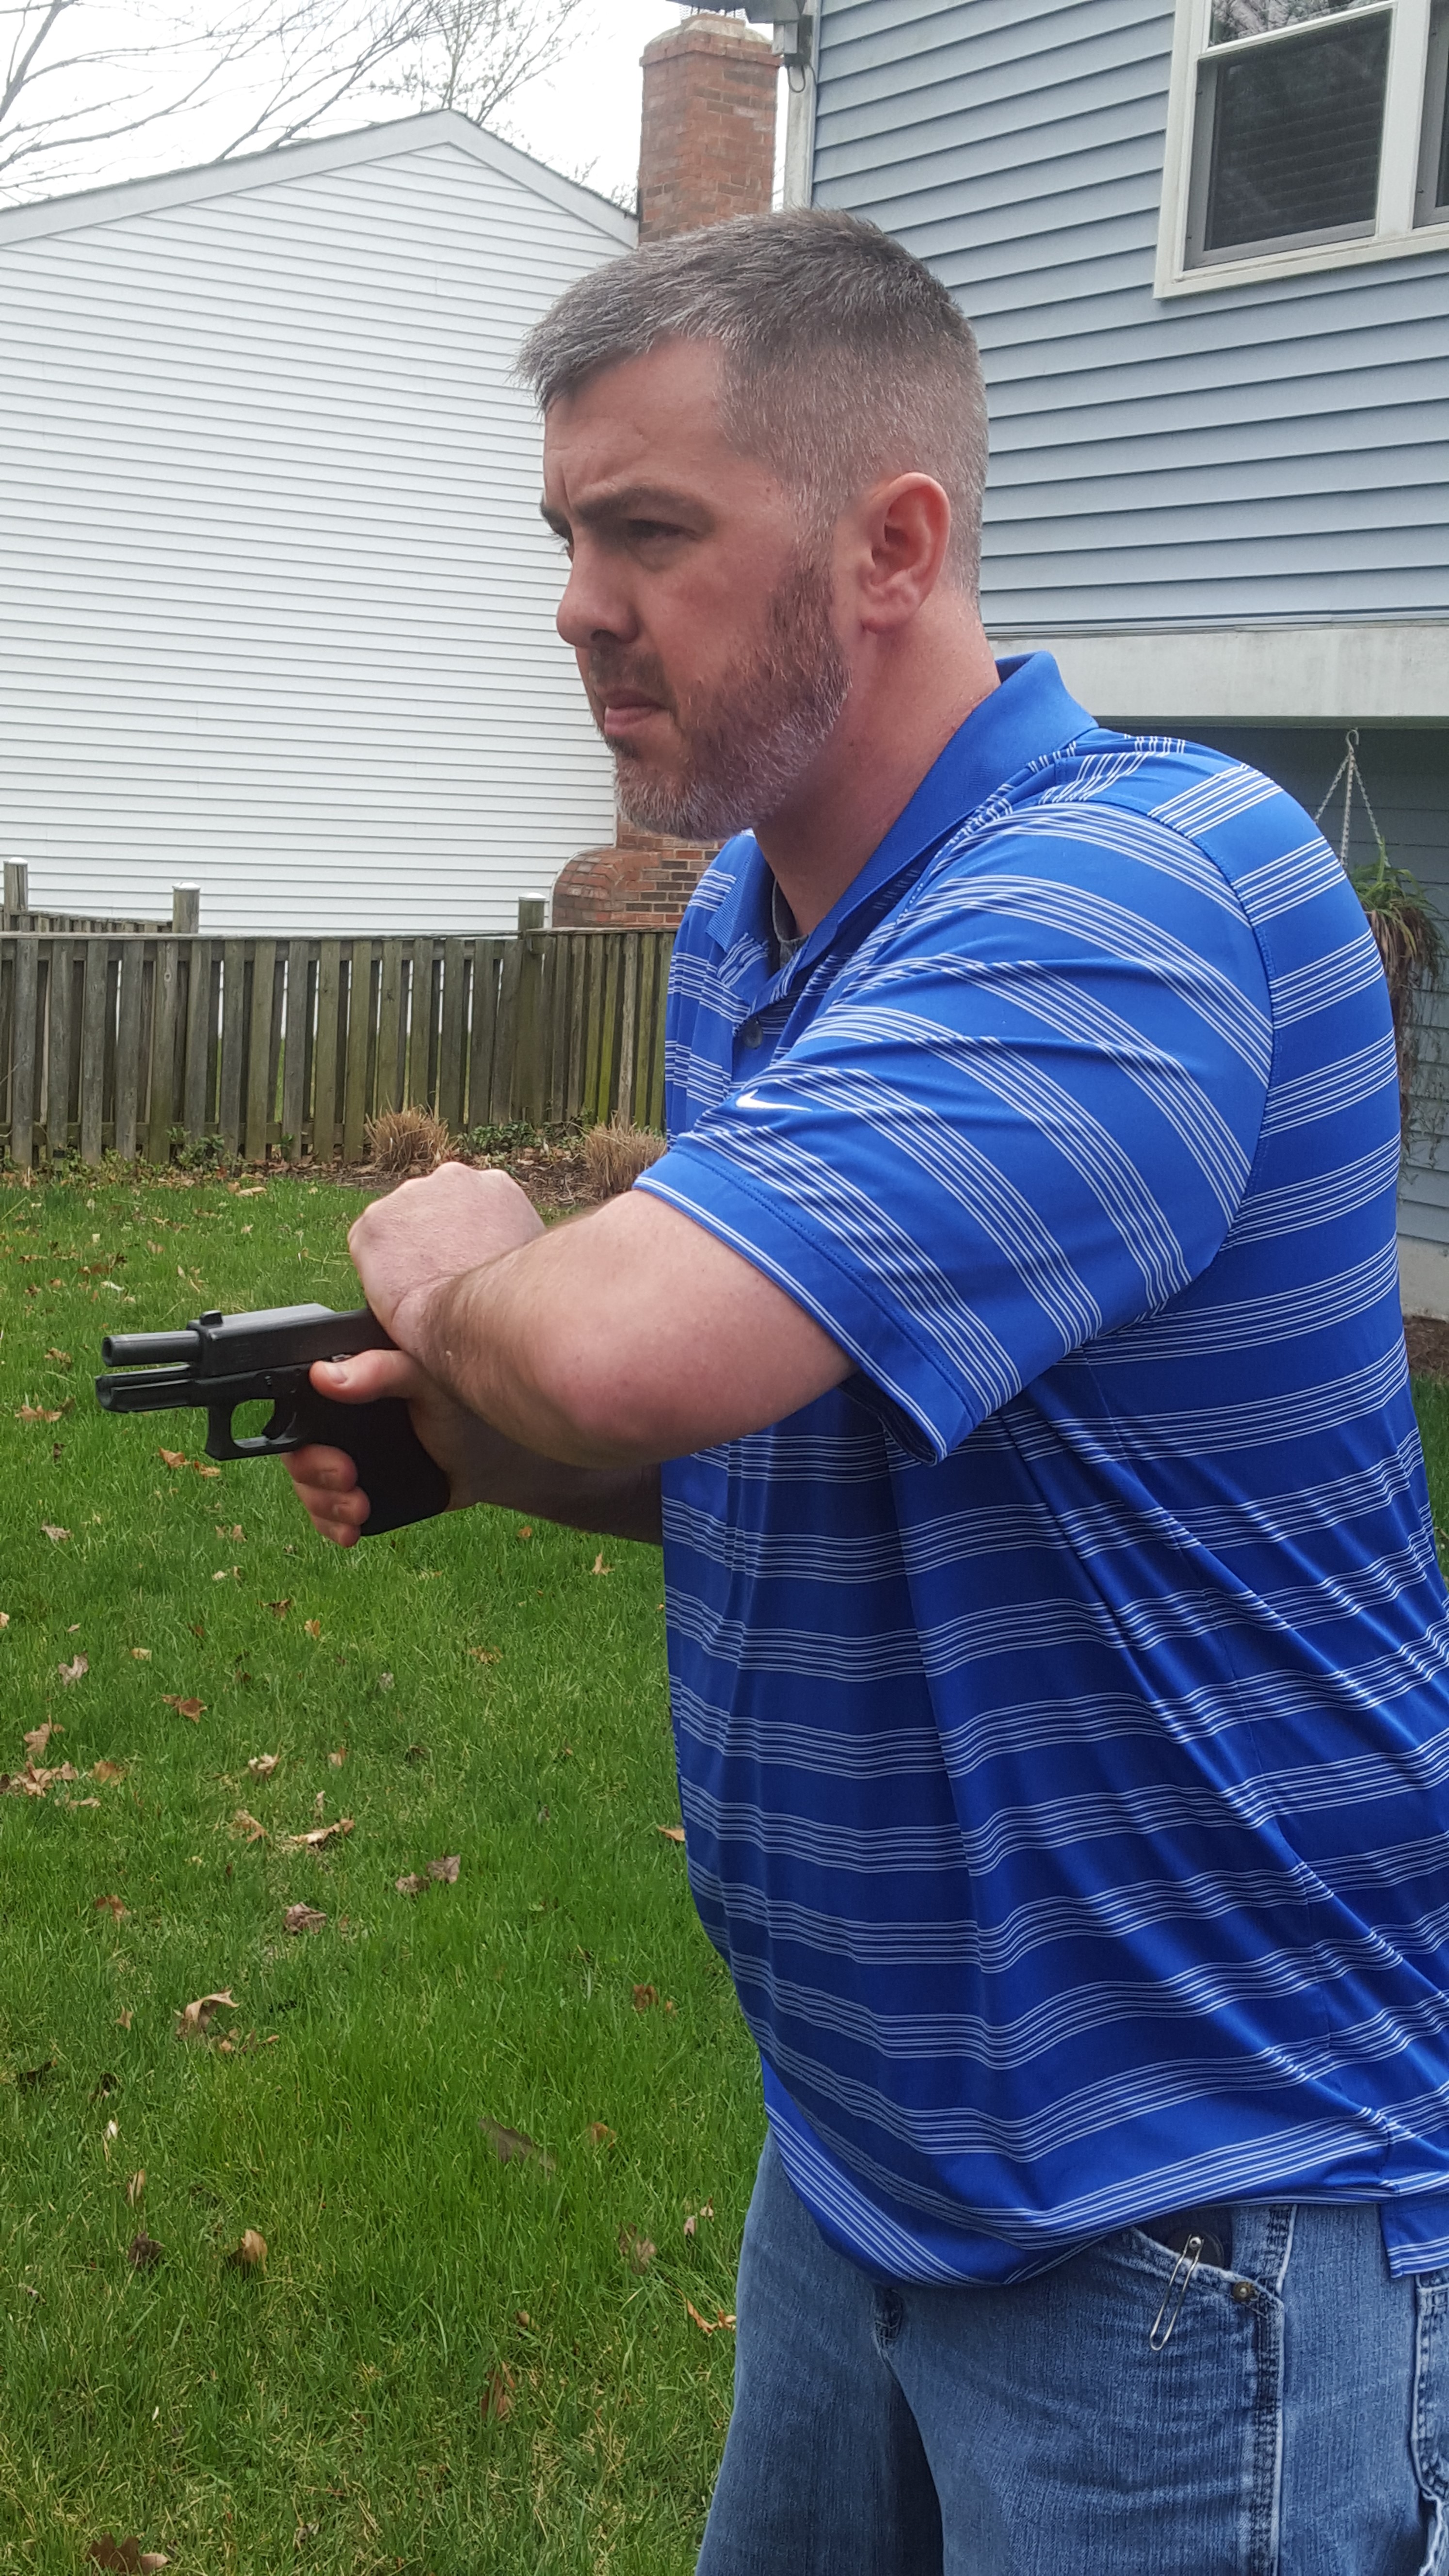
He is now pulling or racking the slide straight to the rear with his support hand while pushing forward with his strong hand. Photo: Laura Carson
CORRECT METHOD OF LOCKING THE SLIDE TO THE REAR
Now that we have recapped the grip and high compressed ready position, let’s dive into the correct method of locking the slide to the rear.
First, the gun should be in the high compressed ready position. Next, take the thumb on your strong hand and locate the slide stop on your firearm. Once you have located it, push up on the slide-stop lever until it cannot go any farther up. Remember, your gun should be parallel with the ground you are standing on. Now that you have upward pressure on the slide-stop lever, you can take your support hand up and over the slide, behind the ejection port and grip onto the slide. Most pistols have serrations here for you to grip onto.
Now push with your strong hand forward away from your body while simultaneously pulling or racking the slide to the rear with your support hand. Once you feel the slide stop, let go of the slide. If you still have upward pressure on the slide-stop lever when the slide is released and it moves forward, it will lock to the rear on its own without further interaction. If you think about what happens when you shoot the last round out of a semi-auto pistol, the slide automatically locks to the rear. The difference here is that you are pushing up on the slide stop rather than the magazine follower. Again there is no need to ride the slide forward until it catches. When done properly, it will lock to the rear just by having that upward pressure on the slide stop. Obviously you have to pull the slide far enough back so the slide stop can be engaged in the slide indentation, and also have the slide stop pushed upward all the way to the top so it is making contact with the slide so it will fall into that indentation.
LEFT HANDERS WITH A RIGHT-HANDED GUN
If you are left handed and using a gun with a slide stop on the left side of the gun or a gun made for right handers, the only difference in the above steps is that you want to use your trigger finger to activate the slide stop by keeping it straight and along the frame and dragging it up until the slide stop moves all the way to its highest position.
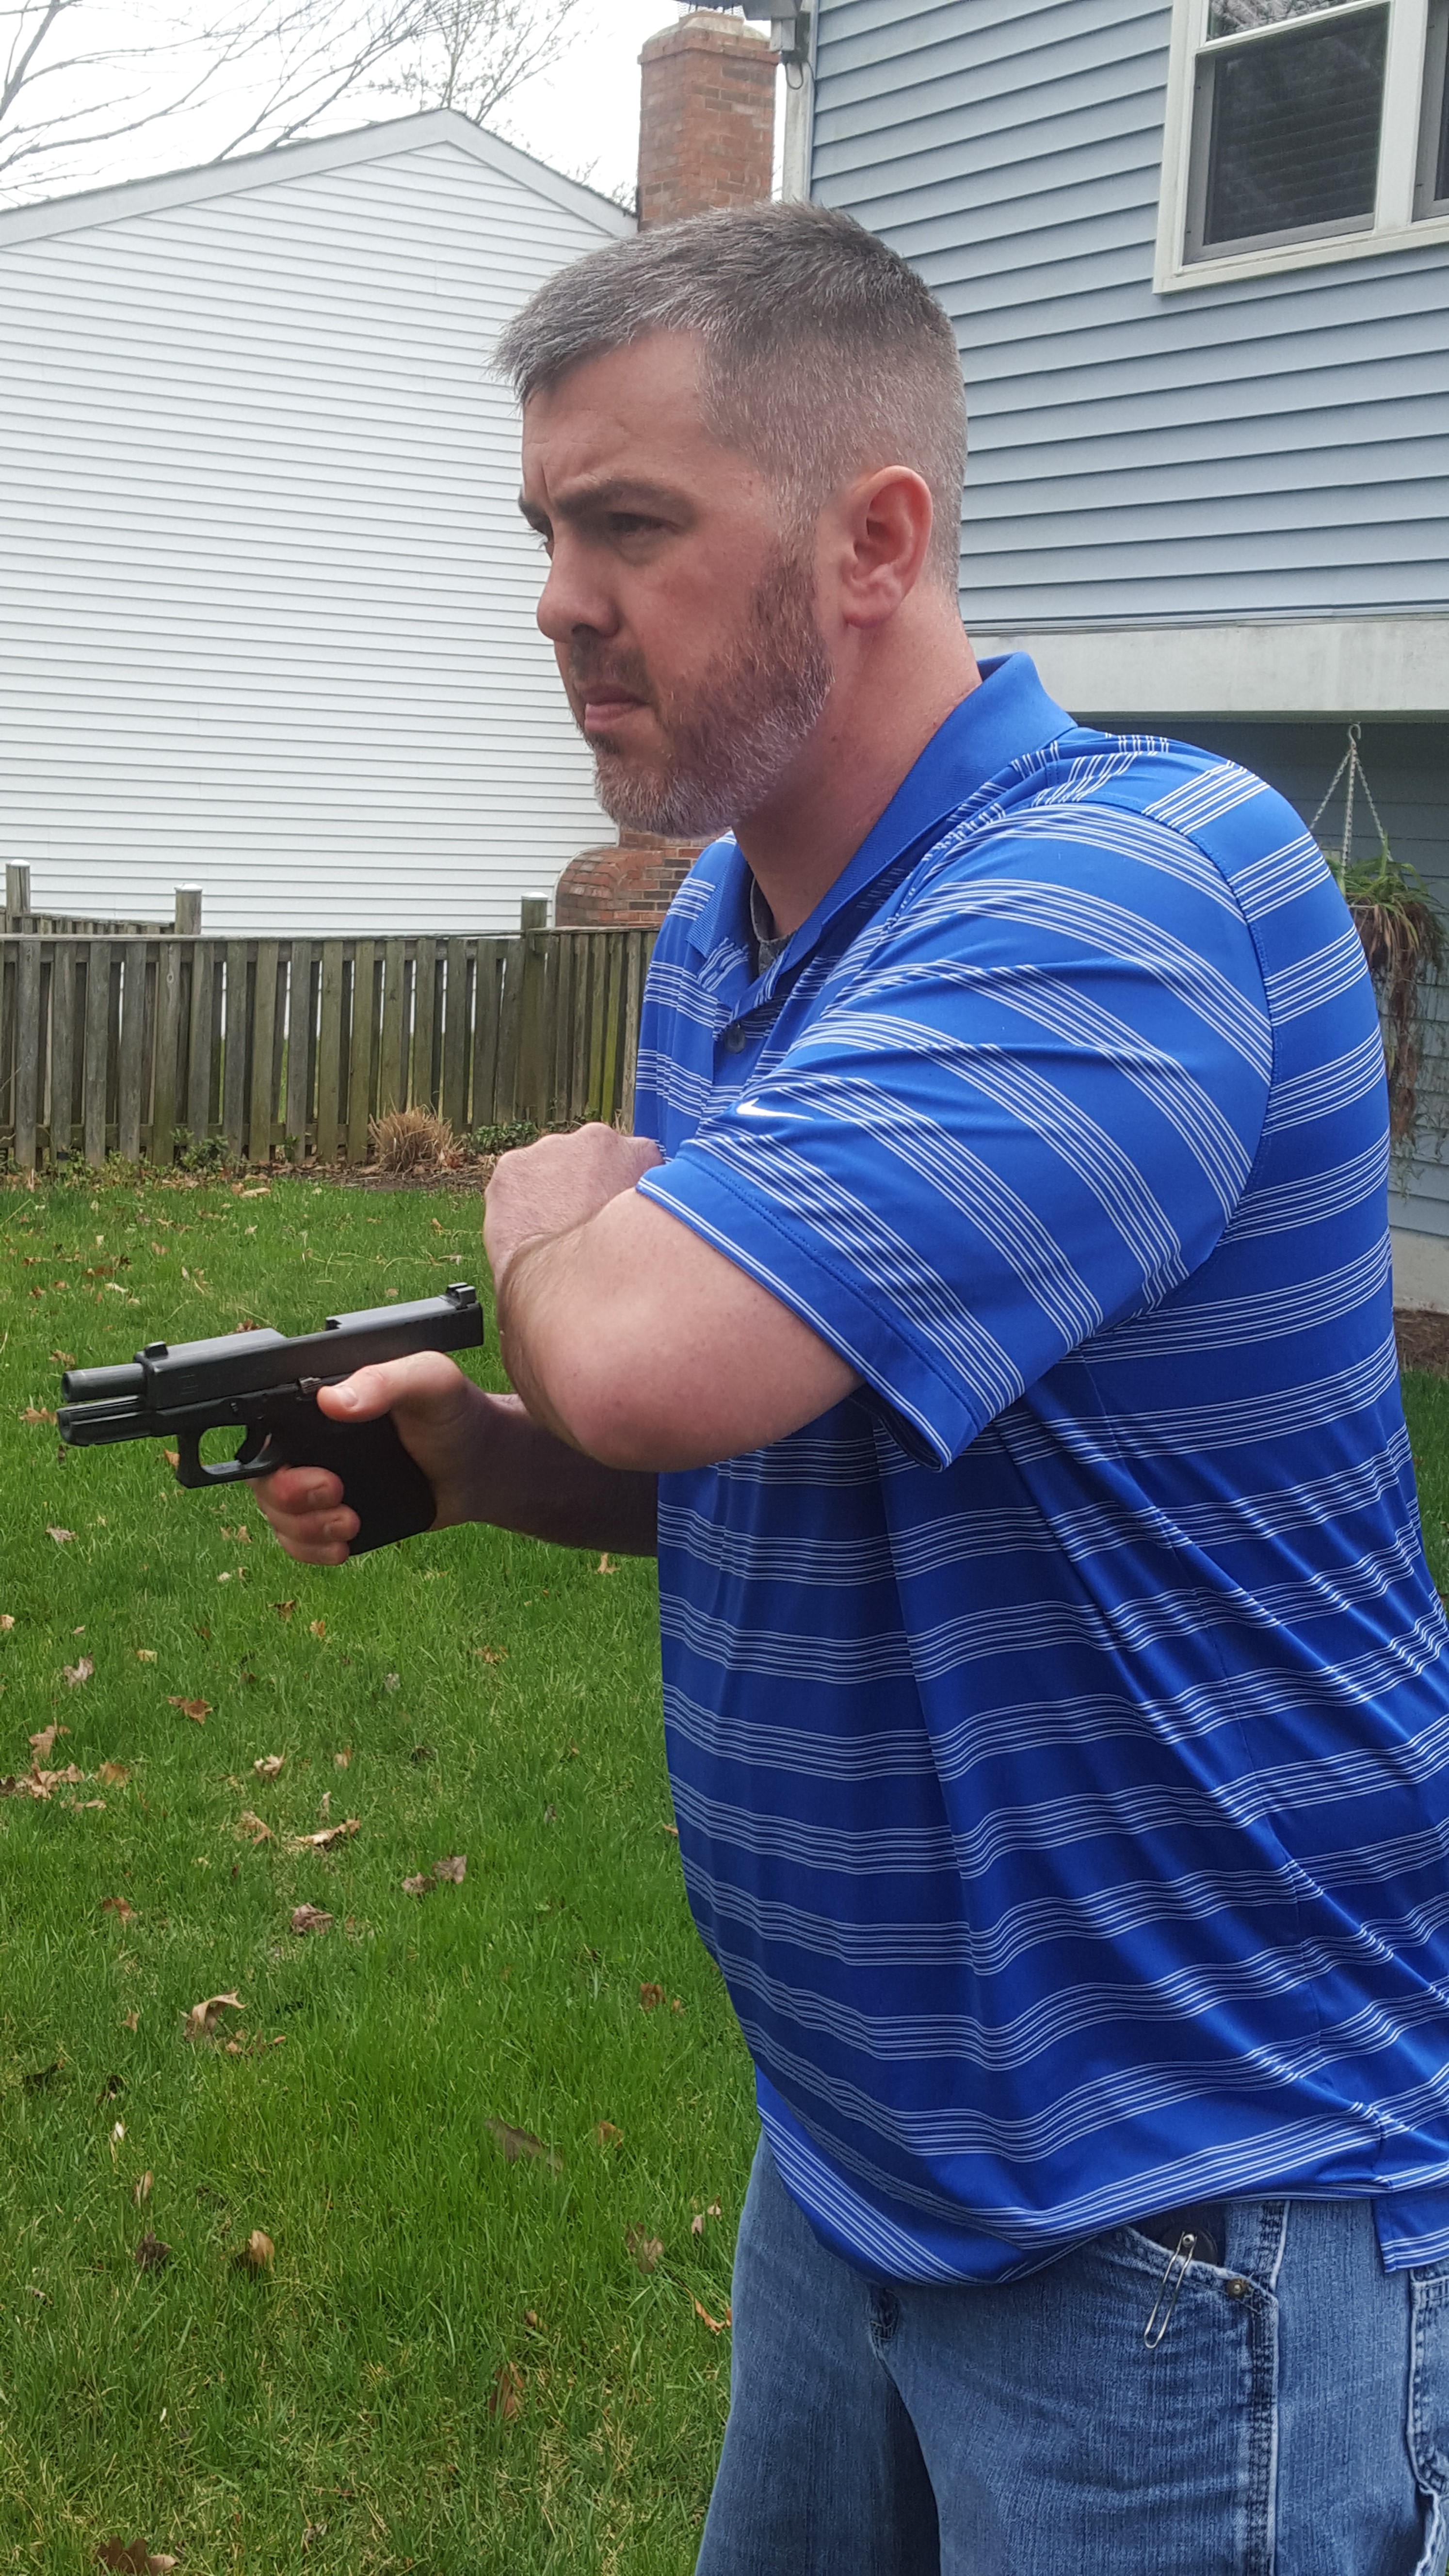
When the author feels the slide stop at the rearward most position, he releases the slide, which is then taken forward by the recoil spring and stops resting and locked on the slide-stop lever.
Photo: Laura Carson
WHY IS THIS THE BETTER AND EASIER OPTION?
For one, you don’t have to sit there holding the slide back to the rear while you find the slide-stop button, which can be difficult for those with less hand strength. It is consistent with loading the pistol because you are pulling the slide back and letting it go, which, by the way, is also how you should be unloading the pistol.
By using these steps and with practice, we hope you can now more reliably and efficiently lock the slide back on your semi-automatic handgun. If you are still having issues, seek out professional instruction and/or comment below for more feedback and discussion.
Common issues for those who still struggle with the above steps include: having a handgun that does not fit them (i.e., they cannot manipulate the buttons and levers on their handguns without breaking or manipulating their grip, which is not desirable in a personal defense handgun), and not having enough dexterity in their fingers to activate levers like the slide stop. With continual and proper practice, you will build dexterity and also strength, which will aid in mastering skills like locking the slide to the rear with ease.
To date, out of the more than 200 students who have come to our training courses and struggled with locking the slide back due to incorrect techniques, all of them have been able to lock the slide back when using this method. For those teaching friends and family, remember, it’s not about strength, it’s about the technique. Be patient and give them clear and concise instructions. Don’t take the gun from them and do it for them. Let them learn and develop the skills necessary to handle the handgun with confidence and competence.
By Evan Carson
Excellent review and routine to be learned
Wish there has been a video. The description sounds great, but a video would have helped.
Thank you! I was having a hard time reloading my firearms which had been bugging for several years.
Thank you...This is a great refresher guide! I've found that a "hand exerciser" really helps to strengthen the individual fingers, relieve carpal tunnel syndrome, and steadies and strengthens your "shootin' hand". Excellent review.
Thanks for addressing left handers in a right handed world.
And if you have a pistol that doesn't have a way to lock the slide back? I have such a pistol. I know how I handle it, what would you do?
good app for getting good information
enjoy
Excellent article. Thank you.
Over the years, I've come across many men and women who are challenged with small hands. To just make a blanket statement saying, "The gun doesn't fit the person." is true; however, is a disservice to those in that situation. TSP teaches this same technique, but also includes an option B method. Keeping in mind that if the operator is locking the slide open to the rear, they have removed themselves from harms way (i.e. it's the end of the day and they're preparing to clean the gun, they're preparing to dry fire and making the gun open empty and safe, or experiencing a double feed malfunction and have moved to a safe location) and there is no direct threat to them. This method begins by keeping the gun level with the ground and pointing down range, or in the direction of a safe backstop. Keeping the gun stationary, the operator will turn their body to the right so the barrel (which will always point down range during this technique) and their left arm are now facing down range. Relax your grip and rotate the gun so you are looking at the left side (where the magazine release button and slider lock lever are.) Take your right thumb and lay it on there slide lock lever. Then apply upward pressure towards the slide (away from you.) While holding this pressure on the lever, take your left hand and grab the slide. The way you grab the slide when using this option is not super critical; however I'd recommend keeping your hand behind the ejection port if possible. Now that you have both hands on the gun and the barrel is still pointing in that safe direction, bring the gun in close to your body about where your bellybutton is located. Now you will do a scissor effect with your arms by pushing your right hand to the left side of your body and the left hand towards the right side of your body. Once you have conducted this technique, the slide should be fully open and the slide lock lever should be engaged. The key here now is to slowly release the pressure on the slide in your left hand BEFORE releasing the pressure on the slide release button under your right thumb. The slide should now be locked open. This method has worked on every style and size of pistol I've come across. Work practice, I'm sure it will work for you as well. Stay safe.