Complex Carbine Functions
In part 3 of this series of articles/tutorials, I am going to demonstrate the more complex malfunctions on the AR-15 weapon platform. Keep in mind that the skills outlined are applicable across a broad spectrum of weapons. Whenever conducting any firearms-related training, it is important to review and follow the four firearm safety rules:
- 1. Treat all guns as if they are loaded at all times.
- 2. Never let the muzzle cover anything you are not willing to kill, destroy or purchase.
- 3. Keep your finger off the trigger until your sights are on the target and you have made the conscious decision to fire.
- 4. Know your target and the environment around it, to include its background, what’s to each side, and its foreground.
Generalized Malfunction Clearance Guidelines
The following generalized guidelines have been proven through training to support fast, efficient and retainable malfunction clearance application under stress:
- 1. Move by getting offline or to cover/concealment while communicating with teammates, partners or family members.
- 2. Bring carbine into natural workspace to perform all combative gun-handling or manipulations.
- 3. Aggressively handle the carbine at all times—attempt to rip the charging handle off the carbine when racking, and release the charging handle as opposed to riding it forward.
- 4. Avoid breaking the final firing grip when manipulating the charging handle, unless absolutely necessary or during remediation of a complex malfunction.
- 5. Breathe and slow down. Taking a little time at the beginning could save you a lot of time at the end. Just because you can do something fast does not mean you’re doing it right.
- 6. CLICK means TAP, MUSH means RIP!
Complex Carbine Malfunction Remediation
Remedial Action Drill (RAD):
- Rip the magazine out of the gun aggressively.
- Retain/Discard the magazine. The time and context of the situation are critical factors: a military troop’s load-out may justify discarding the magazine. But a law enforcement patrolman in possession of one magazine when jumping out of his/her cruiser, or a citizen defending their home will have limited resources, therefore retaining the magazine may be more prudent.
- Pull & Hold the charging handle, hold to the rear during the next step.
- Insert & Digitally Manipulate. While holding the charging handle to the rear, insert fingers and manipulate the stuck rounds out of the chamber. Physically feel with the tip of a finger that the chamber is clear.
- Release the charging handle.
- Reload the carbine with a fresh magazine.
- Rack the charging handle to the rear and release, chambering a fresh round.
- Re-assess the target and environment.
The remedial action process takes time, but like everything, with proper training it can be done quite rapidly. It is of course important to assess the combative environment to determine if time and opportunity are available in order to perform remedial action. Seeking cover and/or concealment is always a sound tactic. Visual inspection of the chamber is suggested in order to determine if a true double feed was the cause of the malfunction. In this case, discarding the magazine is recommended, since in most double feeds, the magazine is the cause. However, if the malfunction is not a double feed, discarding the magazine may not be necessary. A citizen or patrol officer may be faced with limited load-out, making it necessary to hold onto as much ammunition as possible.
Training Tip
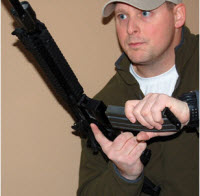
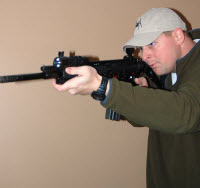
During complex malfunction clearance (Remedial Action Drill), transferring the carbine into the support-side shoulder (for a right-handed operator) is recommended. This has proven to provide the operator with better visualization of the ejection port and the ability to utilize the dominant hand during remediation. In timed complex malfunction remediation drills, operators following this method are as fast as and usually faster than operators retaining the carbine in their right shoulder.
Deep Failure To Eject (stovepipe):
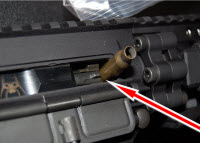
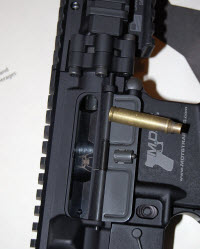
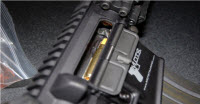
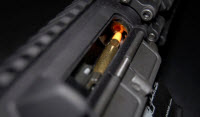
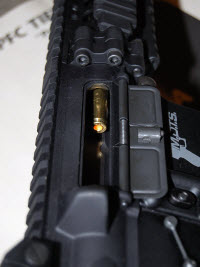
With the deep failure to eject, the bolt has reciprocated and in the process caught the previously spent casing between the actual bolt face and the front vertical edge of the ejection port as it was being ejected. The deep failure to eject can be caused by blocking the ejection port (operator error or possibly crowding cover), dirty weapon, weak or broken ejector, or weak extractor spring. The operator will feel a MUSH when attempting to fire and follow our Refunction Mantra: MUSH means RIP.
Setting Up the Deep Failure To Eject:
- Verify you are using only dummy rounds!
- Carbine, dummy rounds and a magazine.
- With bolt forward on an empty chamber, insert magazine loaded with dummy rounds.
- Pull charging handle back far enough to place spent casing into ejection port between bolt face and front vertical surface of ejection port.
- Carbine, piece of spent brass and magazine with live rounds.
- With bolt forward, insert magazine loaded with live rounds.
- Pull charging handle back far enough to place spent casing into ejection port between bolt face and front vertical edge of ejection port.
Deep Failure To Eject – MUSH means RIP (RAD)
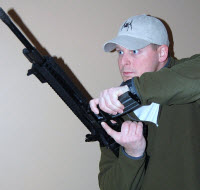 Operator has attempted to fire and experiences a deep failure to eject, feeling a MUSH of the trigger. Remedial action drill is initiated.
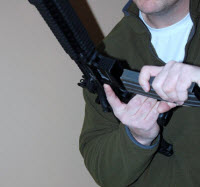 Carbine is rolled outboard into high control and magazine is ripped out.
IF bolt goes forward, RACK, RELOAD, RACK, REASSESS.
*Finger out of trigger guard.
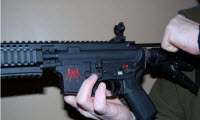 If bolt does not go forward, PULL and HOLD charging handle back, INSERT a finger and DIGITALLY MANIPULATE any stuck casings/rounds out.
Failure To Extract (Linear Malfunction):
With the failure to extract, a round has been fired and the casing of that round remains in the chamber. The bolt and carrier have cycled rearward, cocking the hammer. The bolt and carrier move forward, stripping the next round off the top of the magazine, and jam that round up behind the casing stuck in the chamber in a line (linear malfunction). This is often called a double feed by some, when in fact it is not. The failure to extract can be caused by having a dirty weapon, a blocked ejection port, a broken case rim, a lubricated chamber, or a weak or broken extractor. The operator will feel a MUSH when attempting to fire and follow our Refunction Mantra: MUSH means RIP.
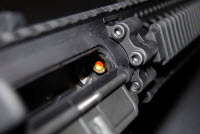
Setting Up the Failure To Extract:
At Home
- Verify you are using only dummy rounds!
- Carbine, (2) dummy rounds and a magazine.
- With bolt locked back, insert a dummy round into chamber.
- Insert magazine with dummy round and release bolt forward.
- Carbine, (1) dummy round and magazine with live rounds.
- With bolt locked back, insert dummy round into chamber.
- WARNING! Using a live round can cause firearm to discharge. If tip of round being fed from magazine impacts primer of round in chamber and bolt is dropped hard, it may result in an open breach detonation!
- Insert magazine with live rounds and release bolt forward.
Failure To Extract – MUSH means RIP (RAD)
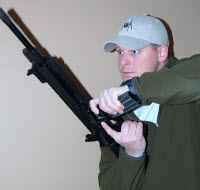 Operator has attempted to fire and experiences a failure to extract, feeling a MUSH of the trigger. Remedial action drill is initiated.
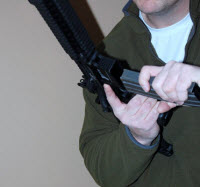 Carbine is rolled outboard into high control and magazine is RIPPED out.
If bolt goes forward, RACK, RELOAD, RACK, REASSESS.
*Finger out of trigger guard.
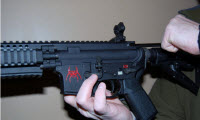 If bolt does not go forward, PULL and HOLD charging handle back, INSERT a finger and DIGITALLY MANIPULATE any stuck casings/rounds out.
Next up, in the conclusion of this series, I’ll cover the final three complex malfunctions: Double Feed, Triple Feed and Failure To Unlock.
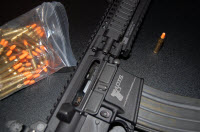

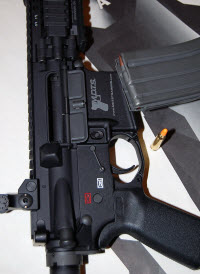
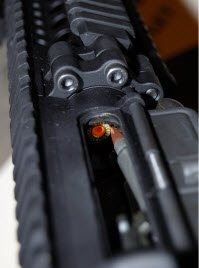
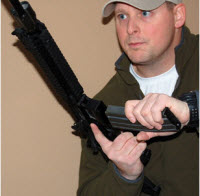
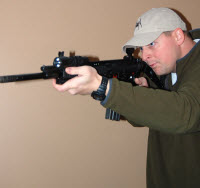
I have been taught, agree & practice that the bolt should be locked-back with the bolt-stop, instead of trying to hold the charging handle back, while sweeping the magazine well and/or chamber. The extra second or two to activate the bolt-stop is much better than having the charging handle slip and having to re-pull on the still uncleared malfunction, and chamber, or worse yet, slamming the bolt into your fingertip. Once the malfunction is cleared, the chamber is then closed with a slap on the bolt-release lever with the supporting hand. A Magpul B.A.D. lever (or similar apparatus) precludes having to reach to the left-side of the AR to activate the bolt-stop, and the trigger finger stays out of the guard and off the trigger. The bolt is easily locked open by pushing the lever UP with the trigger finger, and closed with the lever pushed DOWNward. Lastly, with practice, the lever can be pushed upward while the charging handle is pulled rearward (good for unloading the AR, too). The B.A.D. lever, to me is #3 on the AR priority list. #1 is a good barrel and very close-behind is a good trigger (get rid of the "MIL-Spec" trigger, spend an extra $100 (or more) and get a much better single- or two-stage trigger.
Is the last section linked in a separate email ...?