Hard-to-see sights on a snub-nose revolver are a common complaint. One of the main reasons people don’t use the sights is because they can’t see them. The sighting system has two components, front sight and rear sight. Both can be improved on, in many cases with just a few minutes’ work and very little cost.
Front Sights
Problems with front sights fall into two categories.
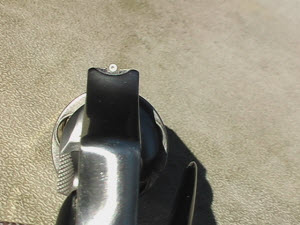
1. Many are only narrowly angled from the eye-target line. One of the main problems J-frame sights have is the shape of the sight itself. The Baughman ramp found on most fixed-sighted S&W revolvers was designed in the 1930s to alleviate snagging on the leather holsters of that era. Sight tracks and synthetic holsters have rendered the Baughman obsolete. The problem with a ramp sight is that it is susceptible to glare and does not visually provide a good contrast to the target. Many newer snub revolvers have upgraded the shape of the front sight or added contrasting elements such as fiber optic inserts, but many snubs still have the 80-year-old design that is very hard to use.
2. They are colored poorly to contrast against the target and to provide a quick visual reference. Neither blue nor stainless is particularly easy for the eye to pick up quickly. There is a reason fire trucks and school buses aren’t painted blue or silver. Blue against a dark target is very difficult to see. Silver generates glare easily.
We would like to improve the contrast between the front sight and the target and between the front sight and the rear sight. In addition, we would like to increase the visual sharpness of the front sight. Using color is the easiest way to improve the contrast of front sight to target. In doing so, it’s best to check to see what color your eyes see best. Eyes perceive color differently and what works best for one person may not work as well for another. Most people will perceive green better than red, but the opposite may be true for you.
Front sights fall into two categories—replaceable and integral. In both cases, we can make significant improvements to the sight picture.
Replaceable Front Sights
Replaceable sights can be readily improved. Those who are mechanically handy can do it themselves, but even having a gunsmith do the work shouldn’t be very costly. To replace such a blade, it is necessary to drive out the pin holding the sight into its channel and then remove the blade, which may require some effort. Because of variations in the location of the retaining pin hole, replacement sights typically are not drilled for the pin. Drilling for the pin is not difficult, but it is precision work, so if hand tools are like Kryptonite to you, this job is best done by a gunsmith.
It also gives a night-sight capability to the J-frame, which isn’t easily available otherwise.
The ramp front sight can also be replaced with a Patridge blade, which will provide a greater contrast to the target. The contrast to the target of a Patridge blade can be improved even more by coloring it.
The Meprolight night sight for the J-frame is poorly designed and should be avoided. The tritium is put in the wrong side and the vial is so low in the sight that aligning the tritium dot in the rear notch results in high hits.
Integral Front Sights
Integral sights can also be improved. The easiest improvements require no gunsmithing and can be accomplished in a very short period of time.
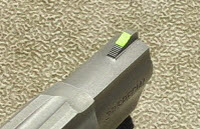 Paint
Paint
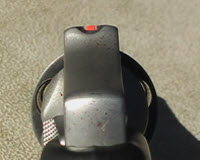
Colored paint or nail polish has long been used to increase front sight visibility. The results will be much better if the sight is first painted with white paint as an undercoating to the color. I like white appliance enamel, available at home centers, but any white paint that will adhere to metal should work. Be sure to degrease the sight before applying paint; denatured alcohol works well as a degreaser. Allow the white paint to completely cure and then apply the color paint over the white.
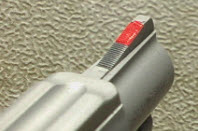 Tape
Tape
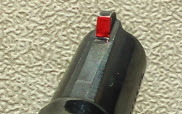
High-visibility tape is another excellent solution. Several types are available at auto parts stores. Once again, it is important to degrease the sight before applying the tape. When applying color, either paint or tape, to the snub’s front sight, a common mistake is to color the entire blade. Since the visual depth of the blade is greater than the visual depth of the rear notch, coloring the entire blade only aggravates the common tendency when shooting a snub to allow the front to come out of the rear notch, resulting in high hits.
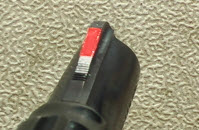 The proper way to apply color is to apply it only to the same visual depth of the rear notch. In other words, when the front sight is too high in the notch, you should begin to see the blue or stainless color of the front sight blade, rather than continuing to see color. With blued guns, I take this one step further and apply silver magic marker to the part of the sight below the color.
Rear Sights
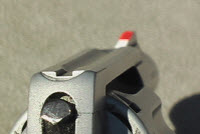 Factory rear sights provide little contrast to the front sight. With a blued gun, generally the rear notch doesn’t require any modification. Changing the front sight provides the contrast. However, the rear sight in stainless or anodized frame revolvers will tend to glare in sunlight and frequently doesn’t provide much contrast to the target, either.
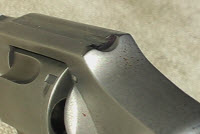 The best approach I have found is to blacken the shiny rear face of a notch with a fine-point black magic marker.
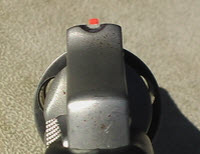 If the sight is too high, it is visually apparent. The silver of the front blade will show above the black rear notch.
This set of references is akin to the “meatball” that guides aircraft to a safe landing on an aircraft carrier.

Reshaping the Angle
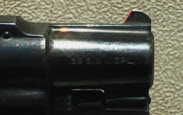 The narrower the angle between the sight and the eye-target line is, the less visible the sight will be. For the mechanically capable, this angle can be increased by filing the rear of the sight. Sometimes this can be sped up by making two intersecting rough cuts with a hacksaw. Be careful—it’s not hard to cut too much. Unless you’re very mechanically adept, this approach is best left to a gunsmith or other skilled metalworker.
In addition to the above solutions, there are several gunsmith-only options. These require significant machining of the revolver; consequently they are costly and may require sending the revolver away for some time.
While not popular with everyone, lasers can provide a huge increase in hit capability from the sighting perspective. Their usage goes beyond the scope of this article, but I am confident that those who try them will find that a laser can provide a great aid to sighting. What they won’t make up for is poor trigger control, any more than any other sighting improvement can.
Improving the visibility of a snub’s sights can pay large dividends in your ability to hit the target, especially as the range increases or the size of the target decreases. The simpler solutions have a very high return on investment, so every snub owner owes it to themselves and their loved ones to give some solution a try.
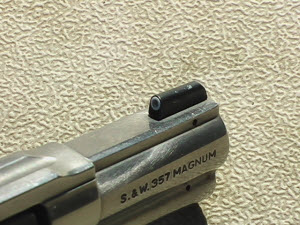

Novost
Novost
Novost
I've used the paint method on my old S&W Model 60 for years. It is the best solution I've found. Lumi Brite makes a Paint that glows after exposure to sunlight or a lamp. It makes the sights easier to see in Low Light Drills.
Kimber K6S sights are pretty damn good. Also, if you're OK with a medium framed revolver (like the Mod 66) that sports a 2.5" barrel length, the standard sights are good enough.
With age I started noticing how slow it took me to get on target and ready to fire. These ideas have definitly improved my response time.
Excellent tips. I painted my front sights with white (rustoleum) many years ago. The ideas in this article take it even further to provide much-appreciated help.
My used S&W titanium .44 Mountain Lite came with a rear 'V' notch and a broken 'Glow' red ramp front. I replaced the red with the Green and the combination is the best I have ever used for fast acquisition low light sights. The 'V' notch beats a 'U' on a snub anyday, IMO.
Can you describe the exact procedure for applying contrast paint to a serrated stainless J frame front sight? …...Taping off sides and other area. Applicator type? Thinning to aid in coverage. Any other helpful instructions. Thanks, Phil Lyons
Not just for snubs. Indoor ranges are often notorious for insufficient light on the guns. I went to a craft store and got a small bottle of brightly-colored fluorescing paint for my front sights. I even used it on my old 6" Mod 28 S&W. - Remember though, "a little dab will do you." You might even want to try a flat wooden tooth pick as an applicator.